
The Less Patient Book Tutorial

Before we begin I would like to point out that I have called this the Less Patient Secret Book because I knew I would never have the patience to do this wonderful book by Randi Parkhurst which inspired me to make the first one which can be seen here. Chris, my husband, says I am misleading people as peeps (meaning moi) with no patience would not attempt to tackle this once let alone twice to write a tutorial for it... he is completely wrong... I am just bloody minded enough not to let it beat me, so I hope you won't too!!
This version uses the Sizzix Matchbox Die and the measurements will suit only that. If you choose to use a large household matchbox as I did in the original version, you will need to adjust the measurements accordingly but the method will be the same. I have used the Sizzix matchboxes because I know the measurements will be the same for everyone whilst the large household matchboxes vary in size from country to country. If bribed enough with large consignments of chocolate or Twiglets I may be persuaded to make a tutorial for the smaller version with measurements... I said 'may' but I won't return the Twiglets or chocolate and I am going to be a little busy for the next couple of months packing up the house and moving back home to the UK.

You will need the following:
2 sets of the Sizzix Matchbox templates.
2 small matchboxes
A couple of brads and eyelets
Drawer handles or knobs
Ribbon
Waxed thread in 4 ply and 2 ply. (You can use cotton thread/embroidery thread and run it over a wax candle)
Embellishments, ribbons, buttons etc for decorating.
Patterned Papers - I have used Weekend Market by BoBunny and a couple of pieces of Authentique.
Chipboard in these sizes:
3 pieces 8” x 5 ¼” = covers A
2 pieces 4 ¾” x 3 ¼” = covers B ( plus 1 piece 3 ¼” x 2 2/8”)
2 pieces 1 1/8” x 5” = covers C
2 pieces 3 ¼” x 2 ½” = covers D
2 pieces 3 ¼” x 1 ¾” = covers E
2 pieces 2 1/8” x ½” = covers F
4 pieces 1 ¾” x 1 1/8” = covers G & H
15 A4 or letter sized sheets of copy paper. (You will only need these if you choose to use the same papers for pages as I did. Alternatively you could use cardstock or patterned papers but be aware that on the smaller books the thinner the paper the easier it will be to work with).
If you wish to have the same distressed look to your papers then you can use this tutorial to achieve the look.
Page Sizes for the Books
(You do not need to cut these immediately, the info is here for you to refer back to later)
Cover A Page Size = 10” x 7 ¾” { 8 }
Cover B Page Size = 5” x 3” { 8 }
Covers C Page Size = 5” x 3 ¼” { 10 }
Covers D Page Sizes = 3 ½ x 3 1/8” { 12 }
Covers E Page Sizes = 3 ½” x 3” { 12 }
Covers F Page Sizes = 4” x 6/8” { 7 }
Covers G & H Page Sizes = 2” x 1 ½” { 16 }
NB. All these are folded in half to make the pages so the actual number of pages is doubled.
Cut out and make up the two matchboxes.
If you have the Matchbox die then I would glue patterned paper to one side prior to cutting out the inner section as this will save you having to decorate the insides after it is made up. I don’t have the die and was kindly supplied the templates from a friend so added my papers to the inside after making them up.
Cover the outside of the matchboxes with strips of paper. You will need 4 pieces 5 ¼” x 2 ½”

Using patterned paper cover one side of each of the 3 chipboard Covers A.
One of these is the base and only the bottom of it will show because the two matchboxes sit on the other side of it.
The other two are the covers of the top book so choose papers that you want on the front of your book but keep in mind that very little of the back cover will actually show. Sand all the edges smooth and ink if you wish.

Take the base cover A and place it with the patterned paper facing down on your work surface. Arrange the 2 Sizzix matchboxes onto it, lining them up with the two outer edges.
You will notice there is a small strip in the centre that shows so cut a piece of patterned paper to cover that section before you attach your matchboxes into place with double sided tape (DST).

Now take the back cover of your cover A’s and place on the top. Adhere it with DST. This firms up the structure so you can now proceed to finishing the top book off.

Make the pages for your main book. I have supplied a tutorial for making the distressed coffee paper here.
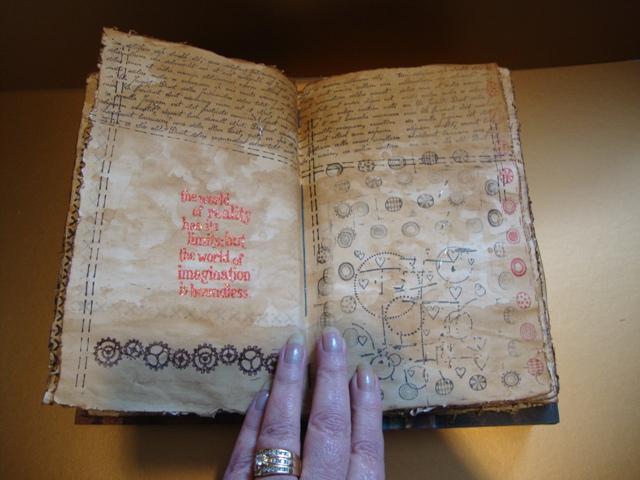
The pages are 10” x 7 ¾” and I used 8 for my book. Distress and ink the edges. I have stamped various images and done embossing on mine.
Bind the pages together. I used this tutorial which is great and easy to follow for binding the pages.

I chose to reinforce the edges of my large pages with some patterned papers for two reasons, one the papers that I used have a wonderful crackle and olde worlde effect and I didn't want them to tear when I sewed the bindings, the other is that with the additional fatness on the spine I am able to add some bits to the pages with some depth without making it difficult to close. You can skip this if you prefer.

Getting the pages ready for binding by making holes in them all for the waxed thread.

This is what it should look like when you are binding the seams.

and the finished set of pages all sewn together.
You can now see how much of the chipboard you will need to cover with offcuts of patterned paper.
Using DST on the front and back pages attach the pages to the inside of the front cover and the top of the box with the drawers.

You will need to cover the back of the drawers section. I cut a piece of chipboard and papered it leaving extra pieces each end to attach it to the base of the book.

I added a couple of dabs of hot glue to the centre section to make sure it stayed in place.
If you need to make the patterned paper inserts for the matchboxes... now would be a good time to do it. Add your handles to the front of the drawers, these could be knobs, handles ,ribbons knotted on the inside or beading... anything you like.

I had a couple of 7Gypsies drawer type handles handy and used them.

Now using patterned paper cover the other chipboard pieces (C,D,E,F, G and H) with papers... both sides as they are small and don’t use much paper. Sand the edges and ink if you wish. Leave covers B and the other piece for the moment.
Cut the pages for your 6 little books. Yep, a couple of them are pretty teeny weeny so do them last from the offcuts of the other ones.
I have added the number of pages I used on each book in brackets after the page sizes above but if you are using other papers that may be thicker you will need to reduce the number of pages so that the books don’t get too fat to fit in their spots... been there and done that and it is not fun at all!!
The page sizes are at the top of the tutorial and the number in brackets is how many pages I used.
Now you can bind all the little books... I have used 4 ply waxed linen thread on the big book and 2 ply on the smaller books and I’m going to go lie down in a dark room while you do it... About half way through binding the first couple I took a break and went and watched Criminal Minds... thinking it might give me ideas on how to get revenge on the peeps that begged for a tutorial. Two thirds through the pile I resorted to wearing my reading specs... and I never wear my reading specs!! Lots of cups of tea to keep you going.... ignore the sherry... it would not be a good idea at this stage... you can have a sherry when we are finished...
So now you have this awesome pile of various sized books... please sit and look at them and be chuffed to bits... now we have to finish making their homes!!
Taking Covers B and the other piece of chipboard and your two small matchboxes... In the original Book of Little Patience I used the large household matchboxes and the sizes were smaller so there is only one matchbox on the end. When I came to make up this version I suddenly found I had much more space to fill... well, what’s a girl to do?? Yes, we are going to replicate the big version!!

Attach the little matchboxes to the base leaving a small gap in the centre. Attach the piece of chipboard 3 ¼” x 2 2/8” to the top of them.

You know that teeny weeny book you made earlier that when you were putting it together you were saying things like whisky tangy foxtrot and Annette is totally mental? If you did what I said, it should fit in the gap perfectly.... if you didn’t do as I said, it probably won’t! ;)

I couldn’t think of anything practical to do with this midget of a book so I just added my signature to the pages and dated it.
Now you can see why the pages you cut for this book didn’t seem to be the correct size... they are shorter because the matchboxes take up a section of the space.

Cover the inside of the two little matchboxes... and no, I don’t have a really easy way of doing this, I just sit the matchbox on a piece of patterned paper and score around it gently... then remove the matchbox and make proper score lines on the inside of my gentle ones so that it is smaller than the matchbox. Snip each of the four corners, fold up the sides and insert into place.
Add a small piece of paper to the fronts of the matchboxes and attach a small brad for the drawer handles.

You can now add the two little books G & H to the drawers!! Cute huh?
So you have the two large matchboxes... one has the larger book with the little matchboxes in it so now we need to make a home for the two little books D & E.

You should already have the inside of the matchbox papered, if not, you can do it now. Take a small piece of chipboard just a twitch under 3 ½” x 1” and cover it front and back with matching or contrasting patterned paper. This is the divider for your matchbox. Place your two books into the matchbox and then place the divider between them. Hot glue this into place.

and now they all have a little place to live!!

Voila!! You are finished!! Now you can go break out the sherry....
If you should have a problem and want me to help, please either leave a comment or email me and I will do what I can to explain better or suggest a solution. If you do make a version, I would love for you to leave me a link so I can come and see it... otherwise I have spent two weeks making this and writing the tutorial for nothing... which would suck!! ;)
This tutorial is for personal use only and should not be taught without my prior permission or entered into magazines for publishing, I thank you for your co-operation.


Wise words about the patient (:o) After i've seen your first book, i was thinking about to make one and now..i'm sure!!
ReplyDeleteYou are amazing! Thanks for showing and sharing all your details. Your distressed and stamped coffee paper looks great, too.
Happy Easter
Elly xoxo
I'm blown away by this tutorial. Chris is right. You are bonkers, but I love the way you did this. Of course, don't look for one from me any time soon, because I will NOT be making one. I will just give people your link (grin).
ReplyDeleteAll the details you put into this book are amazing. Stamping, book binding, and decorated coffee dyed pages are just a few of the details, as are the handles and the teeny tiny book. Love it all.
Happy Easter. You deserve to sit for at least two days and appreciate what you have made and this lovely gift you have given to us!
This is incredible Annette, I always knew that you are brilliant paper technician and this proves it beyond doubt.
ReplyDeleteI love all the details and really appreciate all the time and work you have put into the tutorial for us all.
Have a great Easter, you have certainly earnt a glass or two of wine to relax with.
X
oh wow this is just fantastic oh I adore anything like this how super talented are you the detail is just amazing with one,perfect tutorial too hugs Cherylxxxxx
ReplyDeleteWell, from one "less patient person" to another.... your tutorial is fab. I love the papers you've chosen, too. I might just try this, in fact! Thanks for doing it.
ReplyDeleteAnnette this is a wonderful tutorial,and you are wonderful for doing all the hard work and sharing it with us,thankyou SO much and i now look forward to making one,just hope it comes somewhere close to yours
ReplyDeleteAnnette - an amazing tutorial for an amazing peice of art - truly inspiring abd thank you. You DO have the patience, oh yes, definitely!
ReplyDeleteGreat job Annette - and thank you - definitely inspired me to have a go - especially as I have some of those Weekend Market papers which are fab!
ReplyDeleteFantastic Annette-the project and the tutorial!!
ReplyDeleteFabulous - thanks for sharing Annette. X
ReplyDeleteWhy is everyone is happy craftland totally bonkers, patient??? sorry you lost me on page 347.
ReplyDeleteNo really, it looks fabulous, sooo much attention the detail,I would love to play along, but I'm still struggling with Elizabeths AB at the moment. Thanks for the lookey.
janet
That's a WOW - looks so good! I nee4d to come back and study this and then try to make one. Thanks for all the time you have taken to give us a tutorial on this.
ReplyDeleteWow! Hugs, Neet xx
Amazing as always, see you are coming back to UK would love to come and meet the kitties if we are up in Scotland. Just been talking about a trip next year.
ReplyDeleteAmazing as always, see you are coming back to UK would love to come and meet the kitties if we are up in Scotland. Just been talking about a trip next year.
ReplyDeleteThis looks great! Happy creating...
ReplyDeleteWow, this looks amazing! I'll have to bookmark this and come back later!
ReplyDelete