I am sitting here in the basement scrap room and watching the snow fall... just figured out another downside to being in the basement... it could get pretty dark in here if the snow covers the windows up!
One of the other downsides is that it is a few degrees colder down here than the rest of the house... but I have bought a couple of heaters so that shouldn't be a major problem... the snow on the other hand... hmmmm? Anyways, the two cats and I have been playing whilst it snows outside - sounds a pretty good plan to me!! I did go shopping at the weekend and managed to find two pairs of boots. (Two? I hear you ask). yes, one pair is for -40 degrees and the other will be good for -20 degrees. Neither pair will ever be a fashion statement... thick soles, wool fluffy lining... weigh about 5 kilos each foot... I am going out later to get a winter jacket/coat and I am told that I have to put fashion the back of my mind and think 'warm' - as in wearing a feather duvet with sleeves!! My impression of being Mrs Michelin may be revealed at a later date. I had sort of decided that hibernation like the big bears we have locally would be a good idea... but then someone mentioned that you have to clear your driveway and path of snow or the local council do it and then charge you accordingly!! :( So hibernation probably isn't the most cost effective way to go - mind you, the boots weren't cheap either!! Local folk smile at me when I mention the snow... it has done so a few times recently but really, half-hearted attempts that don't stick around for the day and don't actually stop me seeing the green grass, but it is snow and I have spent the last couple of years in Saudi Arabia... we didn't see much of it over there! Oh and speaking of shopping and brown bears...
did you like the neat link I used there, clever eh? Chris and I bought a Christmas tree this weekend gone too! We were in Costco and the trees were stooopid money.. who pays $450 for a Christmas tree?
Not me, obviously! They were also very large and my lounge is not. So we picked up this little guy! Well, we picked up these little guys, actually!
Aren't they sweet? It is only 4 feet tall and has the two brown bears climbing it - they will no doubt be joined by the two cats once it is in place.... I didn't want a prelit one, they all appear to be like this now, which is brilliant as nobody likes to mess about with tree lights, but it meant I wouldn't be able to take it back to Scotland with me...that old voltage problem again!
OK, enough of my blabbing away... it is WOYWW again, they come around at such a speed, they sort of highlight the fact I have done very little since the last one! :( This is my desk... admittedly it is my desk late Tuesday actually, but it will be the same in the morning unless the fairies tidy it up for me while I sleep!

You can see what I have been doing... it is all
Hels' fault too... I was noseying at her desk a couple of weeks ago on WOYWW and spotted that she did the same as me... used an offcut of BIA o'wire as a note holder! This got me thinking... what about actually making a proper holder with the o'wire for her desk? So I sat and had a play and made a box and then attached the o'wire to the top... the prototype version wasn't that pretty -
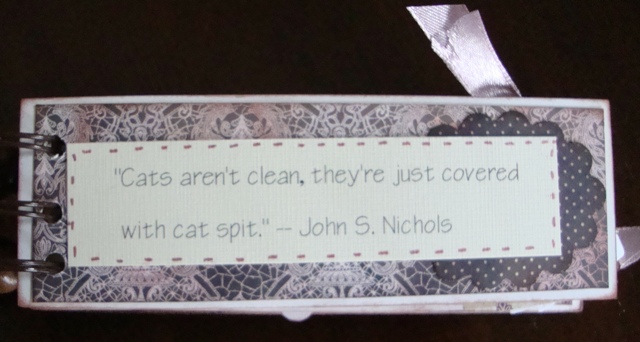
you can spot it at the back of my green mat - so I re-did it with the o'wire centred and I like it much better now. Towards the back of the box are the making of a mini book to go inside... and then I can post it off to her, if it survives the scrutiny of the two cats... who keep stretching up on hind legs to sniff and inspect it! Now this could be because there are two small bags of kitty treats inside for the gorgeous Alfie Cat, to whom Hels belongs. I think I may have to remove the treats as it must be making the box stink of salmon or something... not really quite what you wish to get in a parcel - a fishy smelling box?
I'll try packing them into another bag and hope the smell goes away before it completes it's journey!!
Here are the instructions for making the box and o'wire note holder bit if anyone wants to have a go...
Chipboard cut to the following sizes in inches:
1 off 2 1/2 x 6 3/4 - base
1 off 2 3/4 x 7" - lid
2 off 1 1/2 x 6 3/4 sides
2 off 1 1/2 x 2 1/2 ends
1 off 2 1/4 x 6 1/2 - sits on lid with o'wire
Cut and sand edges of all the pieces. Put last piece aside for later.
Stick all the box pieces down onto patterned paper, using your blade, cut round each piece.
Sand all the edges and ink/stamp/decorate... these are the inside of your box.
Take your 12 x 12 patterned paper and place chosen design face down (mine is double sided, so don't get confuffled)!
I have stamped some bits and decorated the edges with glass flat beads. Arrange your chipboard pieces the same as this photograph and stick them onto the paper making sure to allow a gap between each piece so that it will fold up nicely. I used the width of two pieces of the same chipboard between each.
Cut around the outside of your shape leaving surplus paper flaps where shown in photo. You will use these to hold the box together.
This is what you will have once you have glued the flaps in place with double sided tape. Lightly sand the edges of the paper and ink all the edges.
and this is the inside with your stamping etc.
Now take the last piece of chipboard you cut out and put safely to one side... I have chosen a different paper to cover it.
I used my Crop-a-Dile and punched two rows of 9 holes just over half an inch in from each long side. This matched the 1" o'wire I had chosen to use.
I used thin wire to 'sew' the o'wire onto the chipboard, thread would probably do the same job but may not be as strong. Add some foam sticky pads to the base when you are done.
Voila!! It is complete and you can add some charms etc if you wish. Place on desk and sit back and enjoy!! :) And as there seems to be a bit of confusion as to its use...
You put it on your desk and plonk the occasional reminder or note into the slots to keep them safe and you still have the box for holding lots of bits and pieces.