Friday, 18 March 2011

Box for Beads

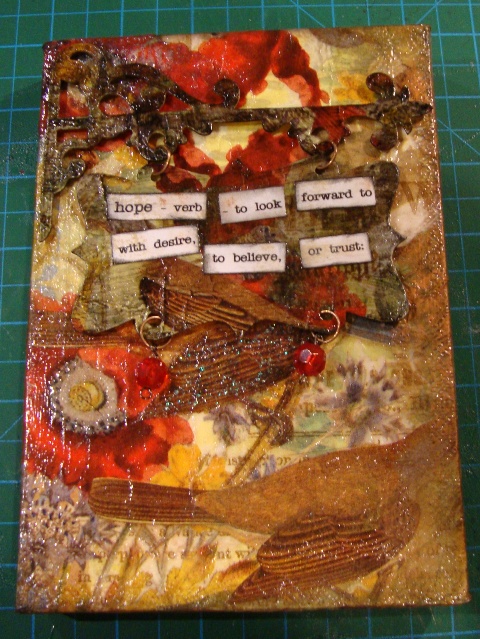
Well, the other box was sitting there on my desk so I figured I may as well get on and pretty it up as well!
This one has birds on it... though they are quite hard to see so I got the embossing fluid and outlined the one at the bottom to give him some definition.
I think you can see it in this picture but the colours are off a bit... oh for some decent light!
I decorated the inside lid and made the satin liner the same as yesterdays button box.
and now it is full of my wooden beads... they are great for feet on boxes or for putting on the o'wires of my BIA books.
So now the matching pair are residing on a shelf and I like them much more than the plastic boxes that were there before!!

Thursday, 17 March 2011

Finished Button Box

I was amazed at how many people also had lovely memories of rummaging and sorting their Grandmother's button box!  I always had a theory about scrapbookers... if you ask a scrapbooker what pretend game they most enjoyed when a child the majority will answer that it involved playing with stationery...  pretend games of being a post mistress and doing a lot of stamping and thumping of envelopes and selling stamps etc, or being a teacher and having lots of little homework books to mark or a secretary with all the memos and things and they all stationery and the playing with it in common.  Next time I ask a scrapbooker the question I am also going to ask if they liked to sort the buttons in their Grannies button tin!!  Stationery and buttons obviously lead to a love of crafting in its many forms...
I finished the button box off yesterday and it is now residing on a shelf looking pretty happy with itself!! ;)
After so many questions about it I thought I would add some details on how it got the way it did. So it started off as a normal lidded box.
You will also need pretty serviettes (decorated paper napkins) and Mod Podge and a couple of brushes. Paint the box with the Mod Podge and then add your pieces of serviette, making sure you cover each piece with Mod Podge as you go along. The serviettes I used were in two layers, so I removed the back layer which left me with the tissue paper thin design layer only.  The pieces look better if you keep the edges of each piece curved or wavy... straight edges show up more.  I used two serviettes for my box as I have about 5 Eiffel Towers on the top of my box as they are layered one on top of each other to give the required depth of colour.
Decorate the top of your box as you wish, I added buttons and a flower with a chipboard button as its centre and some lace down the border.  I wanted my box to have a hinged lid so I cut through the two corners and gently moved that side piece back and forth so it would lift easily.  I hot glued it to the base and then added three black brads to make sure it didn't come loose.
Add your letters down the side and Mod Podge some more serviette into the inside lid and bottom of box if you wish.  I added satin material to the bottom of the box and attached it with double sided tape.
Fill with buttons and stand back and admire!!

Wednesday, 16 March 2011

WOYWW 16 March 2011

The weeks just keep flying by and finally I have snow melting and positive numbers on the temperature gauge!!
I have been playing with some pretty serviettes I bought so you can see what I am in the middle of on my desk this week.
I have a button box which is a plastic one and I was looking at one of the boxes in my collection of them stuffed in a cupboard and thought I would make something a bit more pretty to keep them in.  I remember as a child spending ages with my Grandmother's button tin, sorting them into colours and then sizes and having a lovely time.  She was a very special person, she even 'turned' my Grandfather's shirt collars when they started to wear thin on the inside... I can't quite imagine anyone doing that in this age of throw it away and buy new.  My Mum had a button tin also, I am not sure if she had my Grandmother's, or one of her own, but I can picture the tin now, round and gold coloured with roses on the front. At least now I will have a pretty button box to rummage around in, even if it isn't anything to do with sewing new buttons on a shirt!!
I used satin material to line the inside and used another serviette to decorate the inside lid.
Inked and heat embossed the letters to spell buttons down the side of the lid.
While I had the modge podge and serviettes out on the desk I decided to have a play with a small canvas and used my new Tim Holtz hanging sign die and then turned it over and decorated the back adding the Tim Holtz bird cage to the inside.
So if you get bored with the front.... you can just turn it around! LOL
Don't forget to pop over to Julia's for the ever growing list of like minded souls who bare their desks every Wednesday.

Tuesday, 15 March 2011

Tea on Tuesday

You know when you get one of those days when you wake up and the sun is streaming in through the windows and everything seems so much nicer?  Well, that is today!  The Chinook wind has warmed us up into positive numbers and the snow is melting big time and maybe I will make it through this first long winter in Canada after all!!
Now, you can see that I am really trying quite hard for Tea on Tuesday... as my cup of tea this morning is perhaps the only tea not made from tea leaves that I like!  I first tasted it as a cold drink in Egypt and was most surprised that it was nice.  It also has the prettiest colour... a deep velvety red which might be interesting for dumping lace in to see how it would turn out.  Just behind my tea cup you will see my Splender sweeteners, which brings me to ask a question of anyone living in North America.... why can't I buy those here?  Why don't you have them?  All I can find in Splender are little paper sachets that are messy and not very eco friendly!!  My little box of Splender contains 500 dinky tablets that dispense through a hole in the bottom... neat and easy and even though Splender is an American company they don't do the tablet dispensers here or in the States... only in the UK!!  Why? 
Kimmie, the hostess of Tea on Tuesday can be found here with the linky thing so you can go check out the other tea ladies.... hmmm, why does that not sound quite right?  so you can go check out the other ladies that drink tea!!  Yes, that sounds better!! ;)

Thursday, 10 March 2011

More Cotton Reels/Spools

Finished the one that was on my desk, using Graphic 45 papers.
This is the top with all the sewing bits in place.
and this is with the lid removed showing the inside.
More Grpahic 45 papers for this version.
Showing the decorated top.
This version used the bottom half of the large Bisto tub so I had to come up with a lid that would stay on... used a circle of chipboard raised on foam pads which works a treat!
Here are the three completed ones... now just need to get the sewing machine out and make the snippet rolls!